When was the last time you played in a sandbox or built a sand castle on a beach? Those with no kids will probably answer that it was quite some time ago, probably years. I do believe most of us spend too little time playing. We should do more of that to stimulate our own creativity! This time, however, I want to show you that ”playing” and modeling with sand can be a powerful tool you can use in Permaculture and landscape design.
With the help of sand you can visualize the topography of a plot in tree dimension and it’s a lot faster than building a scale model or work with a 3D program. Most important of all, you can quickly try out ideas and then revert them with the brush of a hand.
I learned this method from Jens Kalkhof during the four day Permaculture seminar I took at Krameterhof and I do recommend you take the same seminar if you get the chance. In this article I’m only showing you the basics of this method. There are many further factors we discussed during this sand-building workshop that won’t fit into this article.
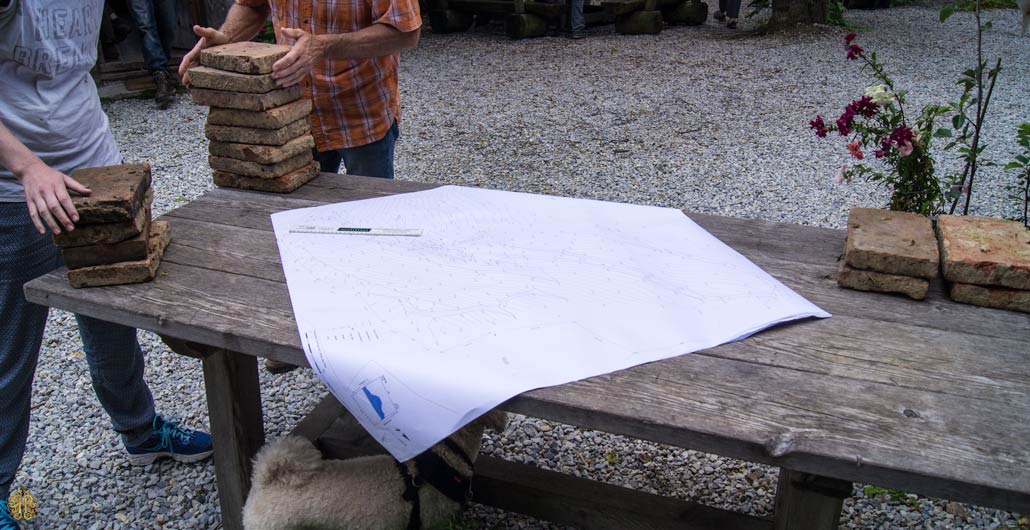
You will need the following:
- A map with contour lines, existing buildings, paths and important trees (trees you wish to keep) marked out. Having an extra copy for reference is very useful. The map should also include compass directions and scale.
- A large table or bench where your map fits in.
- A few buckets of sand.
- Bricks, wood boards or similar to hold the sand in place on the map.
- Tape or blu-tack.
- Scissors.
- Color pens.
- Ruler and/or measuring tape.
- Cardboard or sticks that can easily be cut to the required length.
- Small stones, leaves, twigs or other natural materials to use for marking buildings, trees, paths etc.
How to understand the map
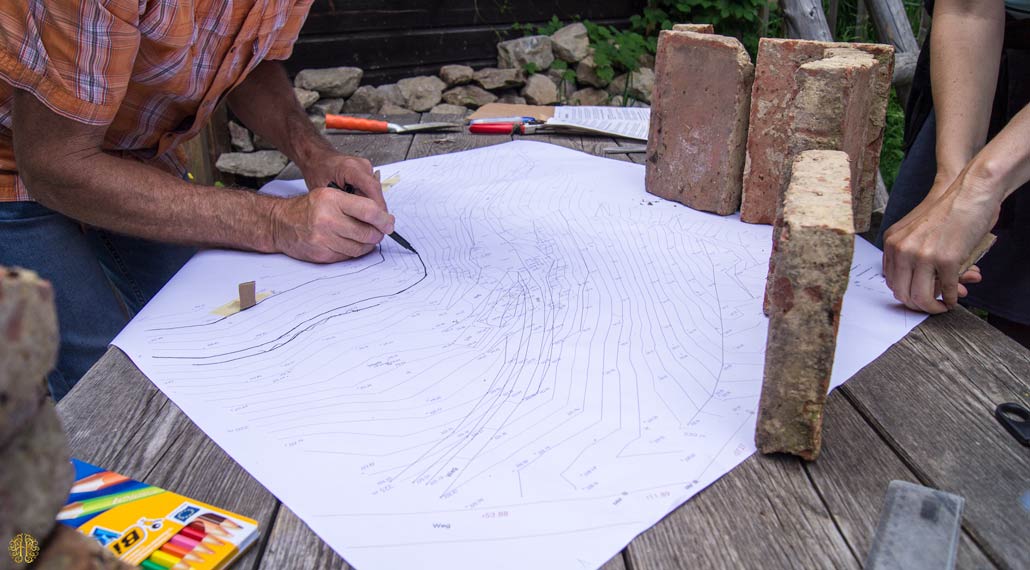
Understanding contour lines is fairly easy. The closer the lines are to each other, the steeper the landscape is. Longer distance between them indicates a flatter landscape. Make sure to check the scale of the map to be able to convert meters to centimeters correctly. You will need this to know how long to cut your paper strips or sticks later.
Time to start modeling
It’s best to work outdoors to be able to see where the sun falls in your model landscape. Turn the map so that the compass directions correspond to the site where you’re working. (If you don’t have an idea about this, use a compass or pick up your phone and check in Google maps.)
Check the lowest and the highest point in your landscape on the map. Calculate the difference between these points. This is the range you will be working in. Let’s say your lowest point is 537 m over sea level and the highest is 581 meters. That means you have a difference of 44 meters. There is no need to use the whole 537 meters in your model (that would mean a ton of sand!). Just use 537 as your zero, and then model up to 581 meters in scale.
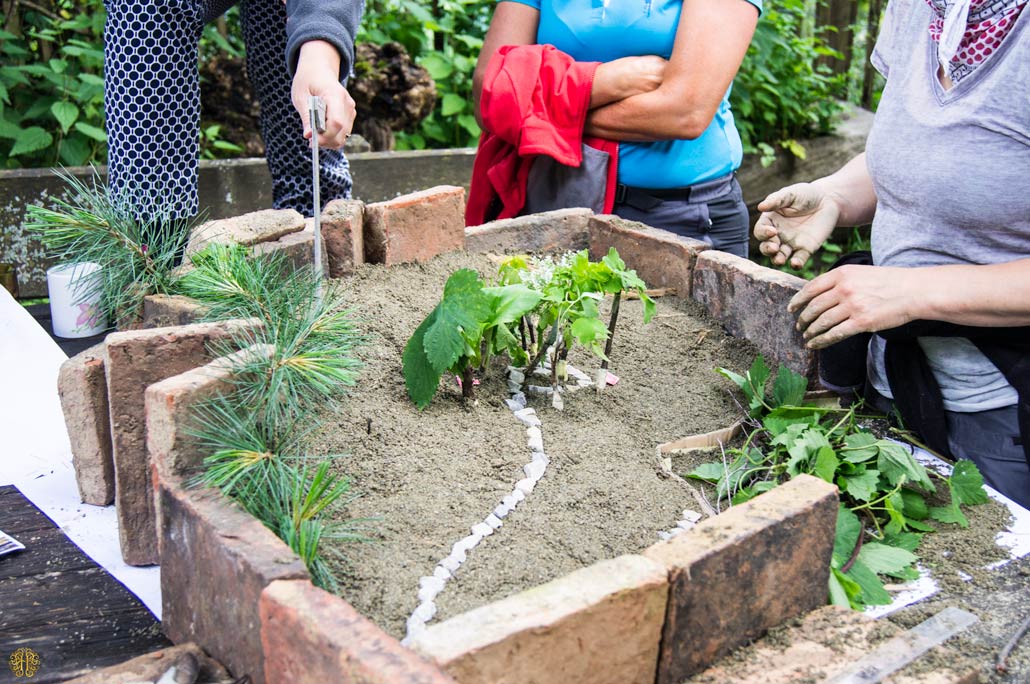
Fill in contour lines with around 5 meter intervals on the map using a color pen. This is usually enough to get an idea about the topography. Place bricks or thick boards around the outline of your plot. They will keep the sand from leaking out. Mark the contour of the landscape around the outline on the bricks/boards.
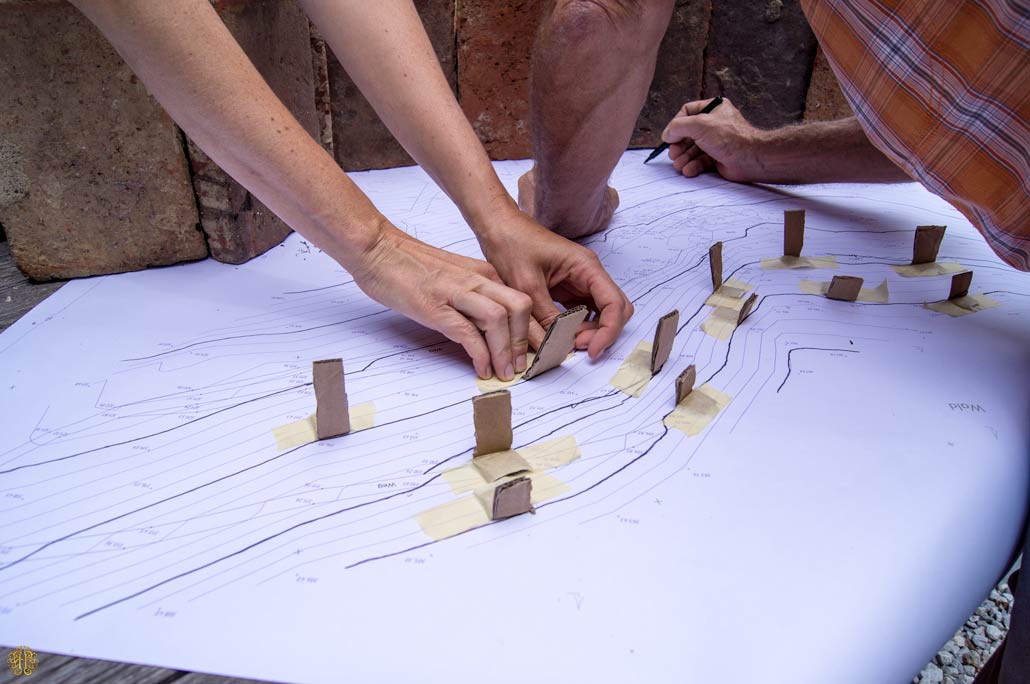
Mark out existing buildings, paths, trees you want to keep (for instance fruit trees) and other important features with the help of paper strips taped to the map or sticks fixed with blu-tack. Make sure to mark these ones with a separate color to not mix them up with the strips marking the topography.

Use the same principle (cardboard strips or sticks) to mark out the height in the landscape. Follow the contour lines you have already marked out and put one strip or stick every five to ten meters. If you notice some radical local differences you can of course place more markers as needed.
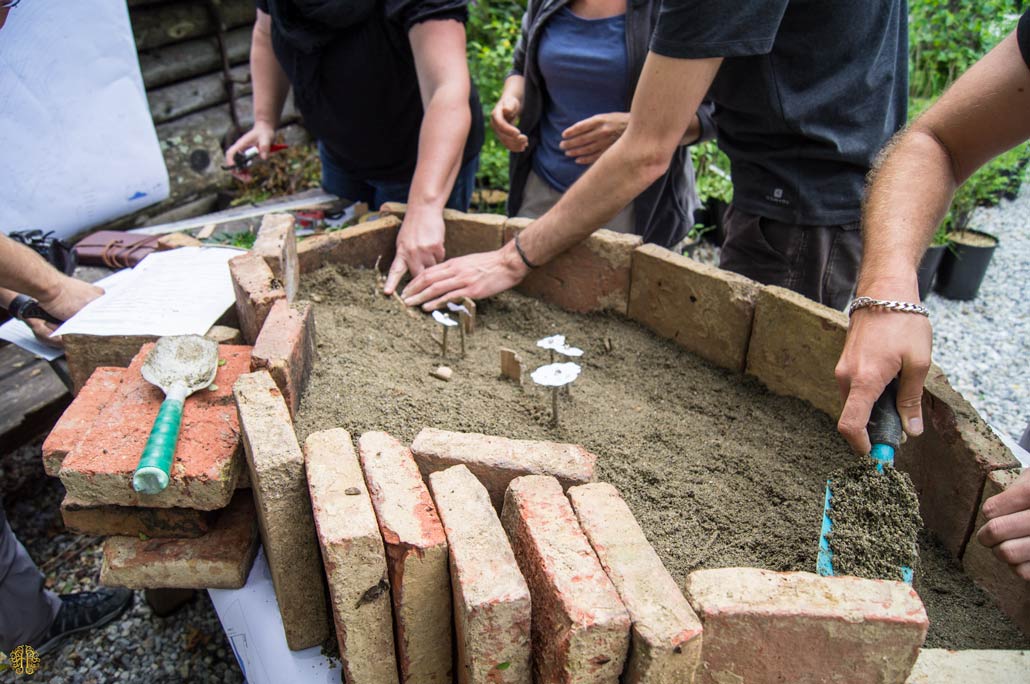
Once you have a grid with markers of the correct height (according to scale) it’s time to fill up the model with sand. Pour in sand carefully and make sure that it just covers the edge of each marker. You now have a basic model of your landscape.
Making the landscape come alive
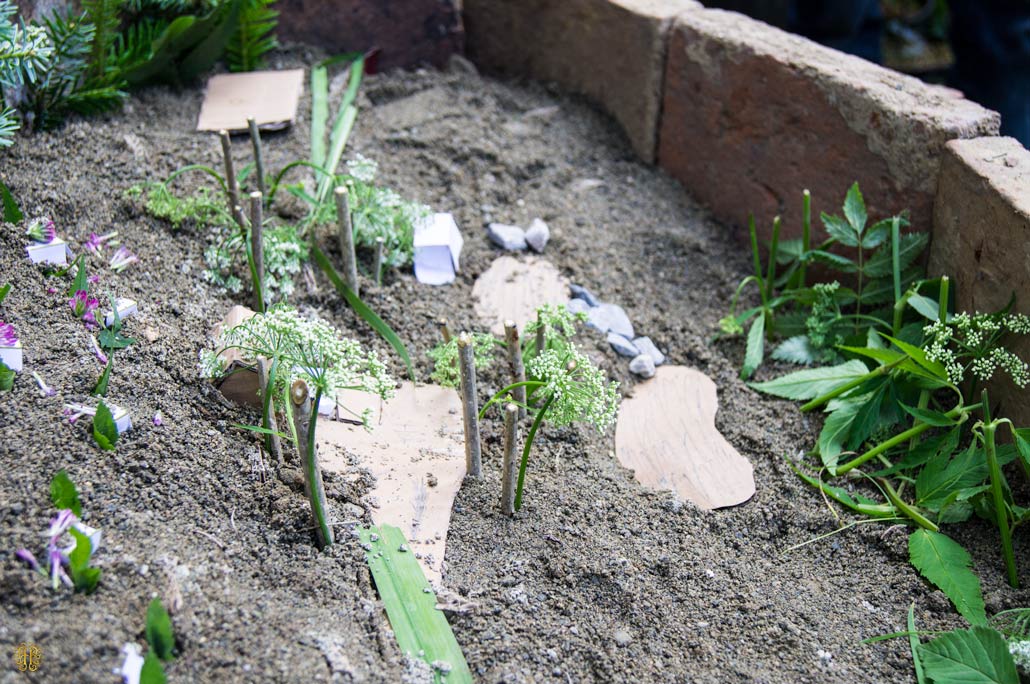
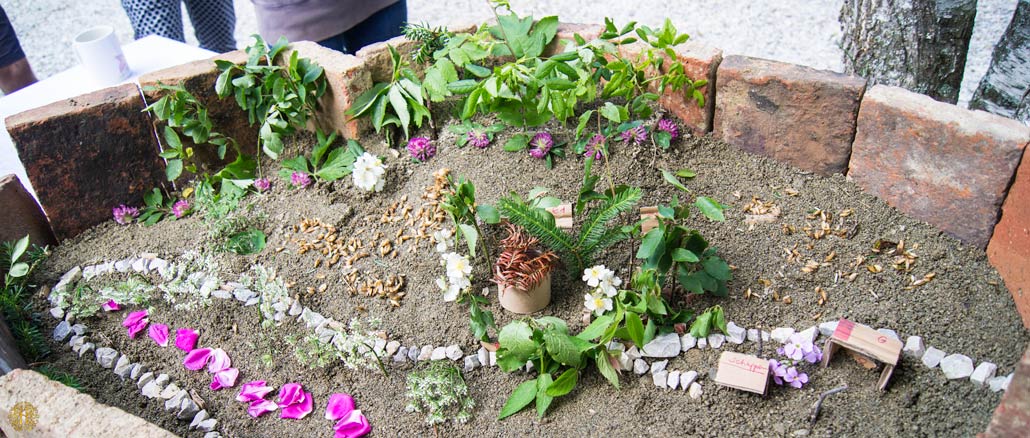
Now let’s make the landscape come alive with the help of some natural materials we’ve gathered. Start with marking out your buildings to scale. You can use sticks, leaves or even pieces of paper if that feels easier. Do the same for your important trees.
You can calculate the hight based on the marked out size of the tree crown or go with an approximate standard height for the type of tree you’re modeling. Use flowers, leaves or similar to mark them out. Paths can be laid out with small stones and ponds can be marked out with large leaves. Use your fantasy to visualize your landscape.
Now you have a full model with important features marked out. With the help of the slope in the landscape you can make fairly accurate predictions of where water runoff will go, if water will gather in certain places, if some spots will be subject to strong winds and much more.
With the information you have right in front of you it might become more clear where an ideal site for a pond would be or where you would ideally build a new barn. It’s also easy to experiment with creating new paths tying different features together using stones and looking at where the landscape is already fairly flat.
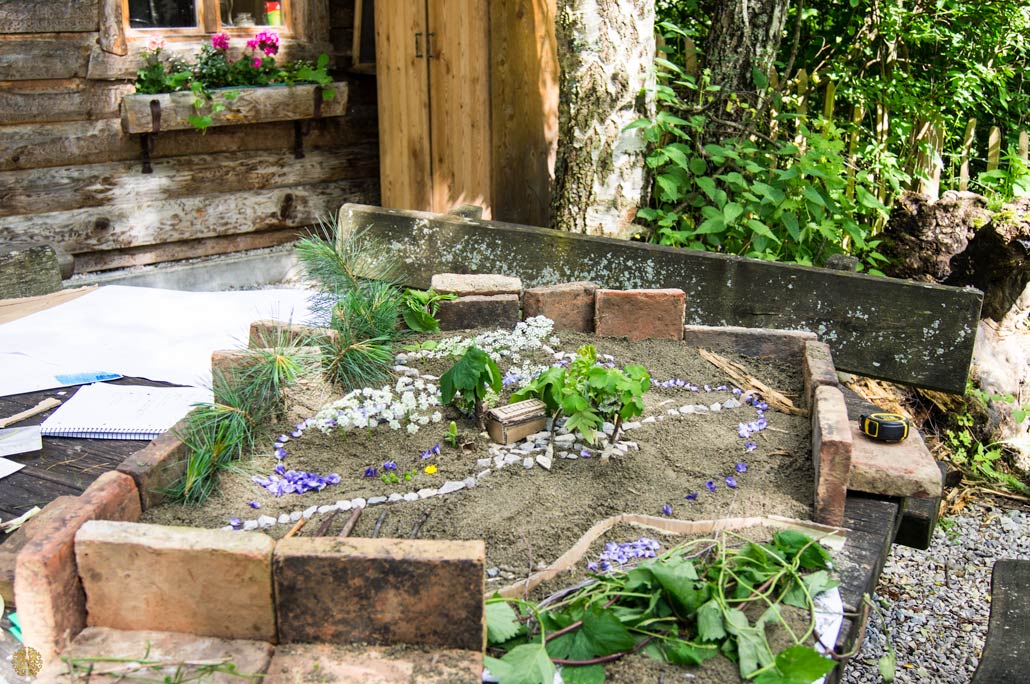
If possible, leave your model around for a few days and have a look at it at different times of day. It might give you new ideas when you see how the sun falls on the plot. Try out different alternatives and take photos. Allow it all to sink in before you take any decisions with a high impact in the landscape.
What this model doesn’t show you
This model gives you a general idea about your landscape, but there are several factors still that you need to take into consideration to make the right choices in your design. Knowledge about soil quality, height over sea level (if you’re far up in the mountains), yearly rainfall, main wind direction, groundwater level and much more will have an impact as well. The more knowledge you have about your plot will make it easier for you to create an efficient design suiting your needs.
0 kommentarer